
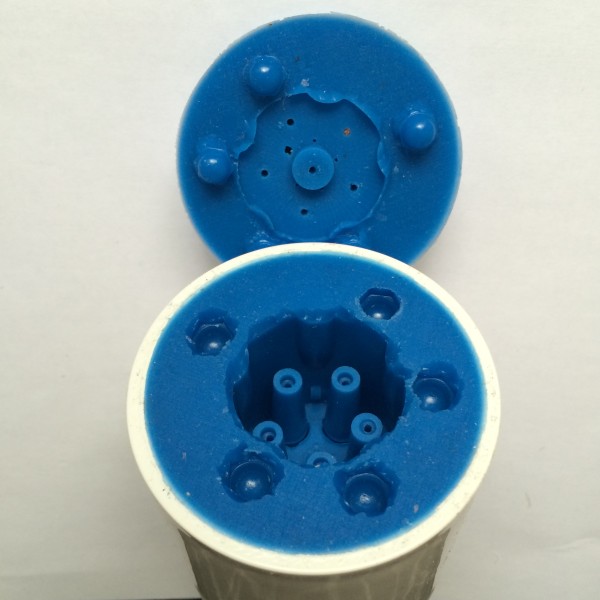
In Part 4 of my blog series The Making of the Wall-Saver safety cylinder, I talked about the failure of my inverted design mold due to the entrapment of air, but the success of silicone chambers. In addition, I tried to glue the plastic inserts that held the brass plungers down, but all the glues I tried failed after a few uses. So it was necessary to make a ridged insert with a corresponding ridge cut out of the chamber. That’s how real snap-caps work, so why not imitate success?
Lacking a lathe (which would have simplified producing ridged insert), and also not having any plastic handy that fit the bill, I decided to try cutting a ridge into the chambers of one of my plastic cylinders, and then taking a silicone casting of that cylinder, and then using THAT casting as a mold master to make molds that would turn out ridged plastic inserts. In addition, I planned to use the plastic cylinder as a new master to create a mold that would turn out cylinders with ridges molded in.

It took quite a bit of effort with CAD/CAM to get a tool path of the right dimension and shape to make an appropriate cut on a cylinder. Truthfully, if I had been a bit better with G-code, it could have been written manually in short order, and that’s what I would do today. But as I didn’t know any better, I fought and fought with the system until it defined the right path, even though it didn’t know it was defining the right path. CAM does not handle undercuts well, so I had to fool it a bit. I also needed a tool that could make an undercut, but Dremel makes triangular points that do the job. Doubtless more expensive solutions exist, but for a small number of cuts on a relatively soft material, that was good enough.
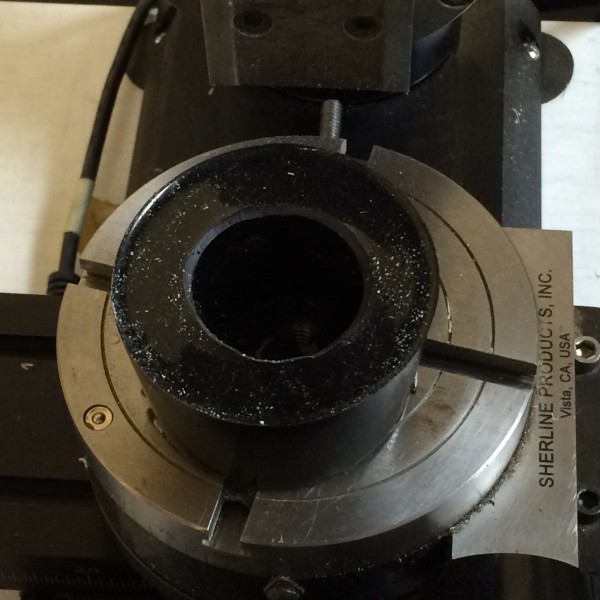
Then I faced the problem of work-holding. How do you grip something with 5 very inconveniently located flutes? No matter what I did, the 3-jaw chuck did not like it. My attempt to build an crude strap that would screw over the back of the cylinder was a failure. So I did something a little nuts: I poured a liquid plastic fixture directly around the cylinder I wanted to cut. I cut the bottom out of a mixing cup, placed the cylinder in it, on top of the rotary table, with a rod extending from the cylinder to a nylon bolt screwed into the rotary table, to keep the cylinder from moving. I used modeling clay to stop up the T-slots and poured in some quick-curing semi-rigid plastic. After a couple hours I had a fixture that was also fixed in relation to the turntable, and with a couple of hold downs applied to it, gripped well enough to allow light cuts.
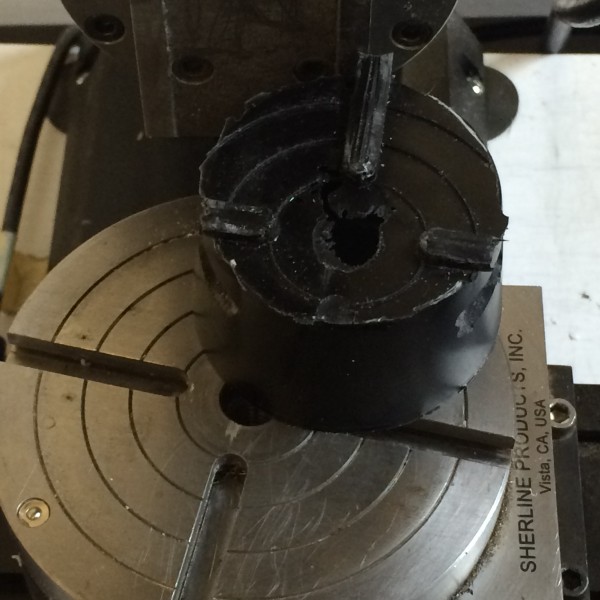
I mounted my best exemplar of a cylinder in the fixture, and set about cutting the ridges in the plastic chambers. That worked fine until…I forgot to verify that one of the chambers was properly centered relative to the headstock. It gouged the cylinder beyond repair and destroyed the best master that I had.
I had to return to the original mold from which the very first casting had been made to make a new master. I did it carefully, using the chamber inserts. Then I very very carefully put undercuts in all 5 chambers using my poured-plastic fixture, and I FINALLY had a master suitable for making the bottom half of the cylinder mold. However, because of some voids in the casting, it would not do for the top half. My plan was therefore to use this new master for the bottom half, then swap it for the ruined version to make the top half. I did that, and got what I thought at the time was my final mold.
Leave a Reply